En este post haremos un tour de metasploit PRO, un GUI comercial con importantes mejoras para el conocido metasploit que nos permite convertirnos en experto pentester de forma rápida y sencilla.
In this post we will make a tour of metasploit PRO, a commercial GUI with significant improvements to the known metasploit allowing us to become a pentester expert quickly and easily.
Metasploit PRO nos guiará por todo el ciclo de un pentest mediante un sencillo y elegante interfaz web como descubrimiento, explotación, recogida de información y generación de informes, etc.
Metasploit PRO will guide us on the whole pentest cycle using a simple and elegant web interface as discovery, exploitation, information collection and generation of reports, etc.
Aunque utilicemos metasploit PRO o la versión Express, el hermano pequeño, es recomendable conocer el uso de la línea de comandos en metasploit para convertirnos en maestros de metasploit!
Although we use metasploit PRO or Express, the little brother, is recommended to know the command line use of metasploit to become a master of metasploit!
Para este ejemplo realizaremos un ataque al metasploitable, una máquina virtual Linux vulnerable que Rapid7 pone a disposición para hacer pruebas.
For this example we will make an attack on the metasploitable, a vulnerable Linux virtual machine created by Rapid7 available for testing.
El proceso de instalación y configuración es tan sencillo que no entraremos en detalles. Una vez que tengamos arrancado el metasploit PRO abrimos el navegador, entramos con nuestra cuenta y veremos una pantalla que nos pedirá crear un proyecto. (Fig. 1)
The installation and configuration process is so easy that we will not go into details. Once we have started the metasploit PRO open a browser, enter our account and will see a screen asking us to create a project. (Fig. 1)
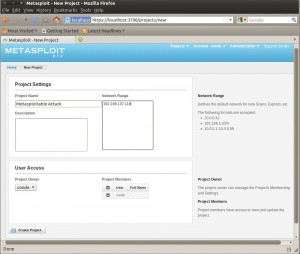
Fig. 1 – Creando un proyecto / Create a project
Una vez creado un proyecto, ahora tendremos varias opciones para comenzar nuestro pentest como vemos en la siguiente imagen. (Fig. 2)
Once created a project, we will have several options to begin our pentest as we see in the image below. (Fig. 2)
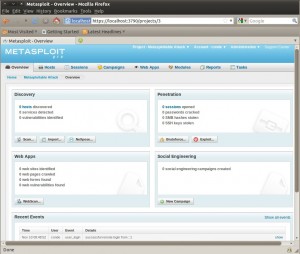
Fig. 2 – Opciones de pentesting / Pentesting options
Siguiendo el ciclo de pentest vamos a proceder a realizar un “discovery” para identificar posibles objetivos. Para ello configuramos el rango IP que queramos escanear y demás opciones. (Fig. 3)
Following the pentesting cycle we will proceed to do a “discovery” to identify potential targets. Set the IP range you want to scan and other options as well. (Fig. 3)
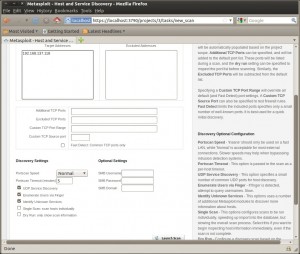
Fig. 3 – Escaneo de red / Network scan
La Fig. 4 nos muestra los resultados del escaneo y encontró una máquina con los siguientes servicios. El escaneo se realiza utilizando Nmap.
The Fig. 4 shows the results of the scan and did found a machine with the following services. Scanning is performed using Nmap.
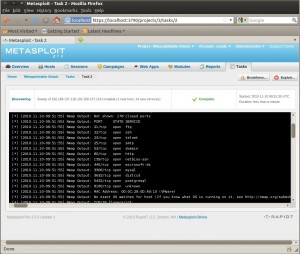
Fig. 4 – Resultado del Escaneo / Scanning output
Ahora que ya tenemos un sistema identificado podemos lanzar un ataque de fuerza bruta para probar contraseñas débiles o conocidas. Es importante tener en cuenta que este tipo de ataques suelen durar tiempo (en mi caso duró 2 horas y eso que ambas máquinas están en la misma red) y además son muy ruidosos, posiblemente harán saltar alarmas en cortafuegos e IDS. Si queremos ser silenciosos no hagáis este tipo de ataques. Ver Fig. 5 para ver la configuración de este ataque.
Now that we have identified systems we can launch a brute force attack to prove weak or known passwords. It is important to note that such attacks are often slow and time consuming (in my case it lasted 2 hours and both machines are on the same network) and they are also very noisy, possibly generating alarms in firewall and IDS. If we want to be silent do not do these kinds of attacks. See Fig. 5 to view the configuration of this attack.
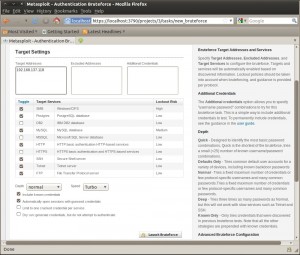
Fig. 5 – Configuración fuerza bruta / Brute force configuration
Una vez configuradas las opciones de fuerza bruta comenzamos el ataque y en la Fig. 6 podemos ver como se está ejecutando el ataque y que ha descubierto una contraseña en el servicio SSH. Una ventaja de metasploit PRO es que al realizar este ataque y al adivinar una contraseña nos creará una sesión en la máquina comprometida de forma automática.
Once configured brute force options start the attack and in Fig. 6 we can see the attack in action and that it has discovered a password in the SSH service. One advantage of metasploit PRO to carry out this attack is that when it guesses a password it creates a session in the compromised machine automatically to carry further attacks from inside.
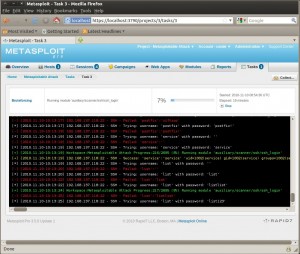
Fig. 6 – Ataque fuerza bruta en acción / Brute force attack in action
Ahora que ya tenemos una máquina comprometida, en este caso mediante un ataque de fuerza bruta, vamos seguir el orden lógico del ciclo de pentest, por lo que vamos recoger información interna del sistema. (Fig. 7)
Now that we have a compromised system, through a brute force attack, we will follow the logical order of pentesting cycle and collect internal information from the system. (Fig. 7)
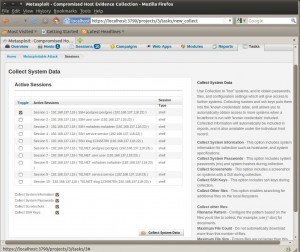
Fig. 7 – Recogida de información / Information collection
La Fig. 8 nos nuestra el resultado de la recogida de información.
Fig. 8 shows us the result of information collection.
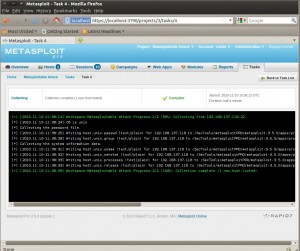
Fig. 8 – Recogida de información en acción / Information collection in action
Es un buen momento para darnos cuenta de que en poco tiempo y de forma organizada hemos identificado sistemas, hemos lanzado ataques de fuerza bruta, hemos comprometido una máquina y obtenido información interna para seguir nuestro pentest. Fascinante y todavía no hemos lanzado ningún exploit 😉
Metasploit PRO guarda todo el historial de las actividades que hemos realizado como podemos apreciar en la Fig. 9 y es muy práctico para saber qué hemos hecho y qué nos falta, sobre todo cuando estamos atacando multitud de máquinas.
It is a good time to realize that in a short time and in an organized manner we have discovered systems, launched brute force attacks, compromised systems and obtained internal information to keep carrying out our pentesting. Fascinating and still we have not launched any exploit 😉
Metasploit PRO keeps record of all activities that we have carry out as we can be seen in the Fig. 9 and it is very handy to know that we have done so far and what is still missing especially when we are attacking several systems.
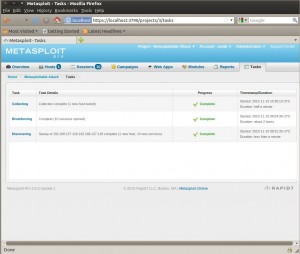
Fig. 9 – Historial de actividad / Task History
Metasploit PRO nos ofrece un scoreboard que nos muestra el número de máquinas identificadas, comprometidas, servicios, etc. como podemos ver en la Fig. 10.
Metasploit PRO offers us a scoreboard that shows the number of discovered systems, compromised, services, etc. as we see in Fig. 10.
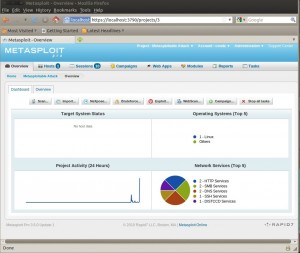
Fig. 10 – Scoreboard / Scoreboard
Como es lógico desde el interfaz podemos seleccionar las máquinas que hayamos identificado/atacado para ver toda la información que tengamos sobre ellas.
Las Fig. 11 y Fig. 12 nos revelan los servicios y la información recogida de un sistema que hemos comprometido anteriormente.
Logically from the interface you can select the systems discovered/attacked to see all the information we have about them.
The Fig. 11 and Fig. 12 reveal services and collected information from a system that we have previously compromised.
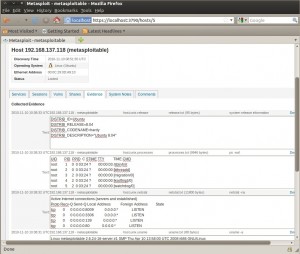
Fig. 11 – Información del sistema comprometido I / Collected Information I
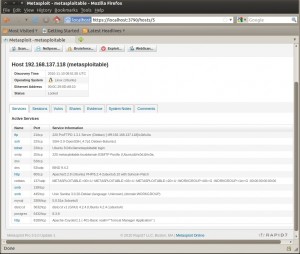
Fig. 12 – Información del sistema comprometido II / Collected Information II
Si observamos los servicios veremos que el sistema atacado tiene web, por lo que sería un buen momento para lanzar un ataque web y descubrir más vulnerabilidades que podamos explotar. J
La Fig. 13 nos nuestra la configuración para realizar un escaneo web, un crawler del sitio web.
If we look at the services we will see that the attacked system has web services so it would be a good time to launch a web attack and discover more vulnerabilities we can exploit J
Fig. 13 shows us the options to perform a website scan, a website crawler.
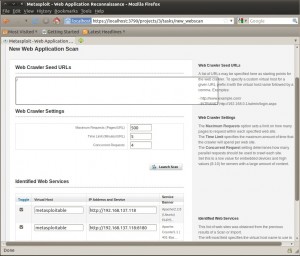
Fig. 13 – Configuración escaneo web / Web scanning options
En la Fig. 14 podemos ver el escaneo web en acción.
In the Fig. 14 we can see the web scan in action.
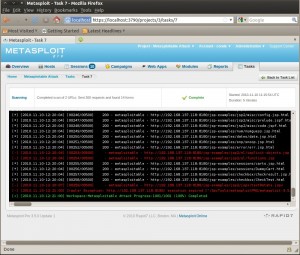
Fig. 14 – Escaneo web en acción / Web scanning in action
Ahora que ya hemos realizado un escaneo del sitio web (crawling) podríamos realizar acciones más complejas como un auditoría o ataque al sitio web como se puede apreciar en la Fig. 15.
Now that we have already performed a scan of the web site (crawling) we could take further actions more complex like an audit or attack the web site as showed in Fig. 15.
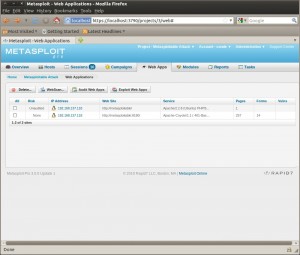
Fig. 15 – Resultados del escaneo web (crawling) / Web scanning output
Al final del ciclo de pentesting e igualmente importante que las otras fases es crear un buen y claro informe que detalle las acciones realizadas, sistemas y vulnerabilidades descubiertas además de información de apoyo (información recogida).
Metasploit PRO también nos ayuda en este aspecto ya que nos permite generar informes con todo lujo de detalles de forma rápida con todo el historial de nuestras actividades. La Fig. 16 nos muestra cómo generar informes con esta estupenda herramienta.
At the end of the pentesting cycle and equally important as other phases is to create a good and clear report describing all actions, systems and vulnerabilities discovered in addition to information collected.
Metasploit PRO also helps us here as it allows us to generate reports with all luxury of details quickly with the entire history of our activities. Fig. 16 shows us how to generate reports within this great tool.
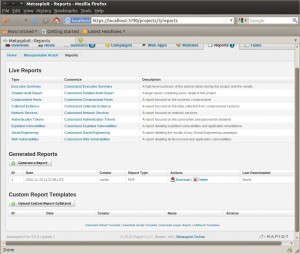
Fig. 16 – Generando un informe / Report creation
La Fig. 17 es un PDF que podemos enviar a nuestro cliente para que pueda leer cómo hemos comprometido su seguridad 😉
Fig. 17 is a PDF that we can send to our customer so he can read how we compromised their security 😉
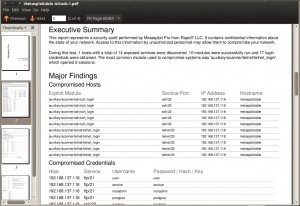
Fig. 17 – Informe en PDF / PDF report
Como hemos podido apreciar a lo largo del post esta herramienta es fundamental para cualquier pentester profesional y posiblemente sea una de las herramientas más completas del mercado.
No he ejecutado ningún exploit a propósito ya que quería que el lector viera lo fácil que puede ser comprometer la seguridad de un sistema sin utilizar exploits. Admito que he utilizado una versión Linux vulnerable, pero aquellos lectores que sean pentester sabrán que no dista mucho de los entornos de sus clientes, probad a realizar auditorías de contraseñas 🙂
As we have seen in the post this tool is essential for any professional pentester and possibly one of the most comprehensive tools in the market
I have not run any exploit deliberately as I wanted to prove to the reader how easy it can be compromising the security of a system without using exploits. Admittedly, I used a vulnerable Linux version but those readers who are pentesters will know that this scenario is not far from real customer’s environments, try to perform passwords audit 🙂
Igualmente me he dejado muchas cosas en el tintero de esta formidable herramienta como son:
- Integración con neXpose, escaneo de vulnerabilidades.
- Pivoting (Proxy y VPN), utilizar un sistema comprometido para comprometer otros sistemas.
- El modo Campaña, para lanzar ataques de ingeniería social y phishing.
- Ataques coordinados entre varios pentesters.
- Y muchas más cosas que podéis en la web oficial del producto.
Also I have left many things in the dark of this formidable tool as:
- Integration with neXpose vulnerability scanning.
- Pivoting (Proxy and VPN), use a compromised system to compromise other systems.
- How to perform a campaign, to launch social engineering and phishing attacks.
- Coordinated attacks between several pentesters, collaboration.
- And many more things you can read on the product website.
Todas estas opciones y muchas más convierten a Metasploit PRO, al estar respaldada por metasploit, en producto líder de su categoría. Podríamos escribir un libro con todo lo que nos puede ofrecer esta herramienta 🙂
Para sacar el mayor rendimiento a Metasploit PRO es conveniente utilizarlo en Linux aunque también existe una versión Windows.
Agradecer a HD Moore y al equipo de Rapid7 al incluirme en la beta del programa y por convertir a metasploit en posiblemente el mejor “explotation framework” del mercado.
¿Cuál es tu explotation framework favorito y porque?
All of these options and many more make Metasploit PRO, supported by metasploit, a leading product in its class. We could write a book with all this tool can offer us 🙂
To get maximum performance of Metasploit PRO it is convenient to use a Linux system but there is also a Windows version as well.
Thanks HD Moore and the Rapid7 team for including me in the beta program and make metasploit possibly the best “exploitation framework” of the market.
Which is your favorite exploitation framework and why?
— Simon Roses Femerling


