
Recientemente me llegó el Bus Pirate (v3 de Sparkfun) considerado la navaja suiza de hardware hacking. Este dispositivo es un interfaz bus universal que permite comunicarse con la mayoría de chips desde el PC y que agiliza la creación de prototipos o para otros usos ;)
Recently I got a Bus Pirate (Sparkfun v3), considered the Swiss army knife of hardware hacking. This device is a universal bus interface that allows communication with the most chips from PC speeding up the creation of prototypes or other uses ;)
La mayoría de Bus Pirate no suelen tener la última versión de firmware por lo que en este post explicaré de forma detallada cómo actualizarlo (en mi caso he actualizado a la 5.10). Se recomienda actualizar el firmware ya que trae importantes mejoras como por ejemplo el “binary access mode”, que nos permite utilizar Python u otros lenguajes con el Bus Pirate.
Most Bus Pirate do not have the latest version of firmware, therefore in this post I will explain in detail how to update it (in my case I upgraded it to the 5.10 version). Upgrading the firmware is recommended because it brings significant improvements as for example the “binary access mode” that allows us to use Python or other languages to communicate with the Bus Pirate.
Antes de nada debemos leer las instrucciones sobre actualización de firmware en Dangerous Prototypes (la web oficial), ya que tendremos que hacer una serie de pasos allí descritos. Para actualizar la versión firmware de 2 o 3 a la versión 4 hay que utilizar el método antiguo (uso de jumper). A partir de la versión 4 la actualización de firmware es mucho más sencilla como veremos en el post.
First of all we must read the documentation for update firmware on Dangerous Prototypes (the official website) since we have to do a series of steps described there in great length. To update version firmware 2 or 3 to version 4 we need to use the old method (use of a jumper). From version 4 firmware upgrade is much easier as we will see in the post.
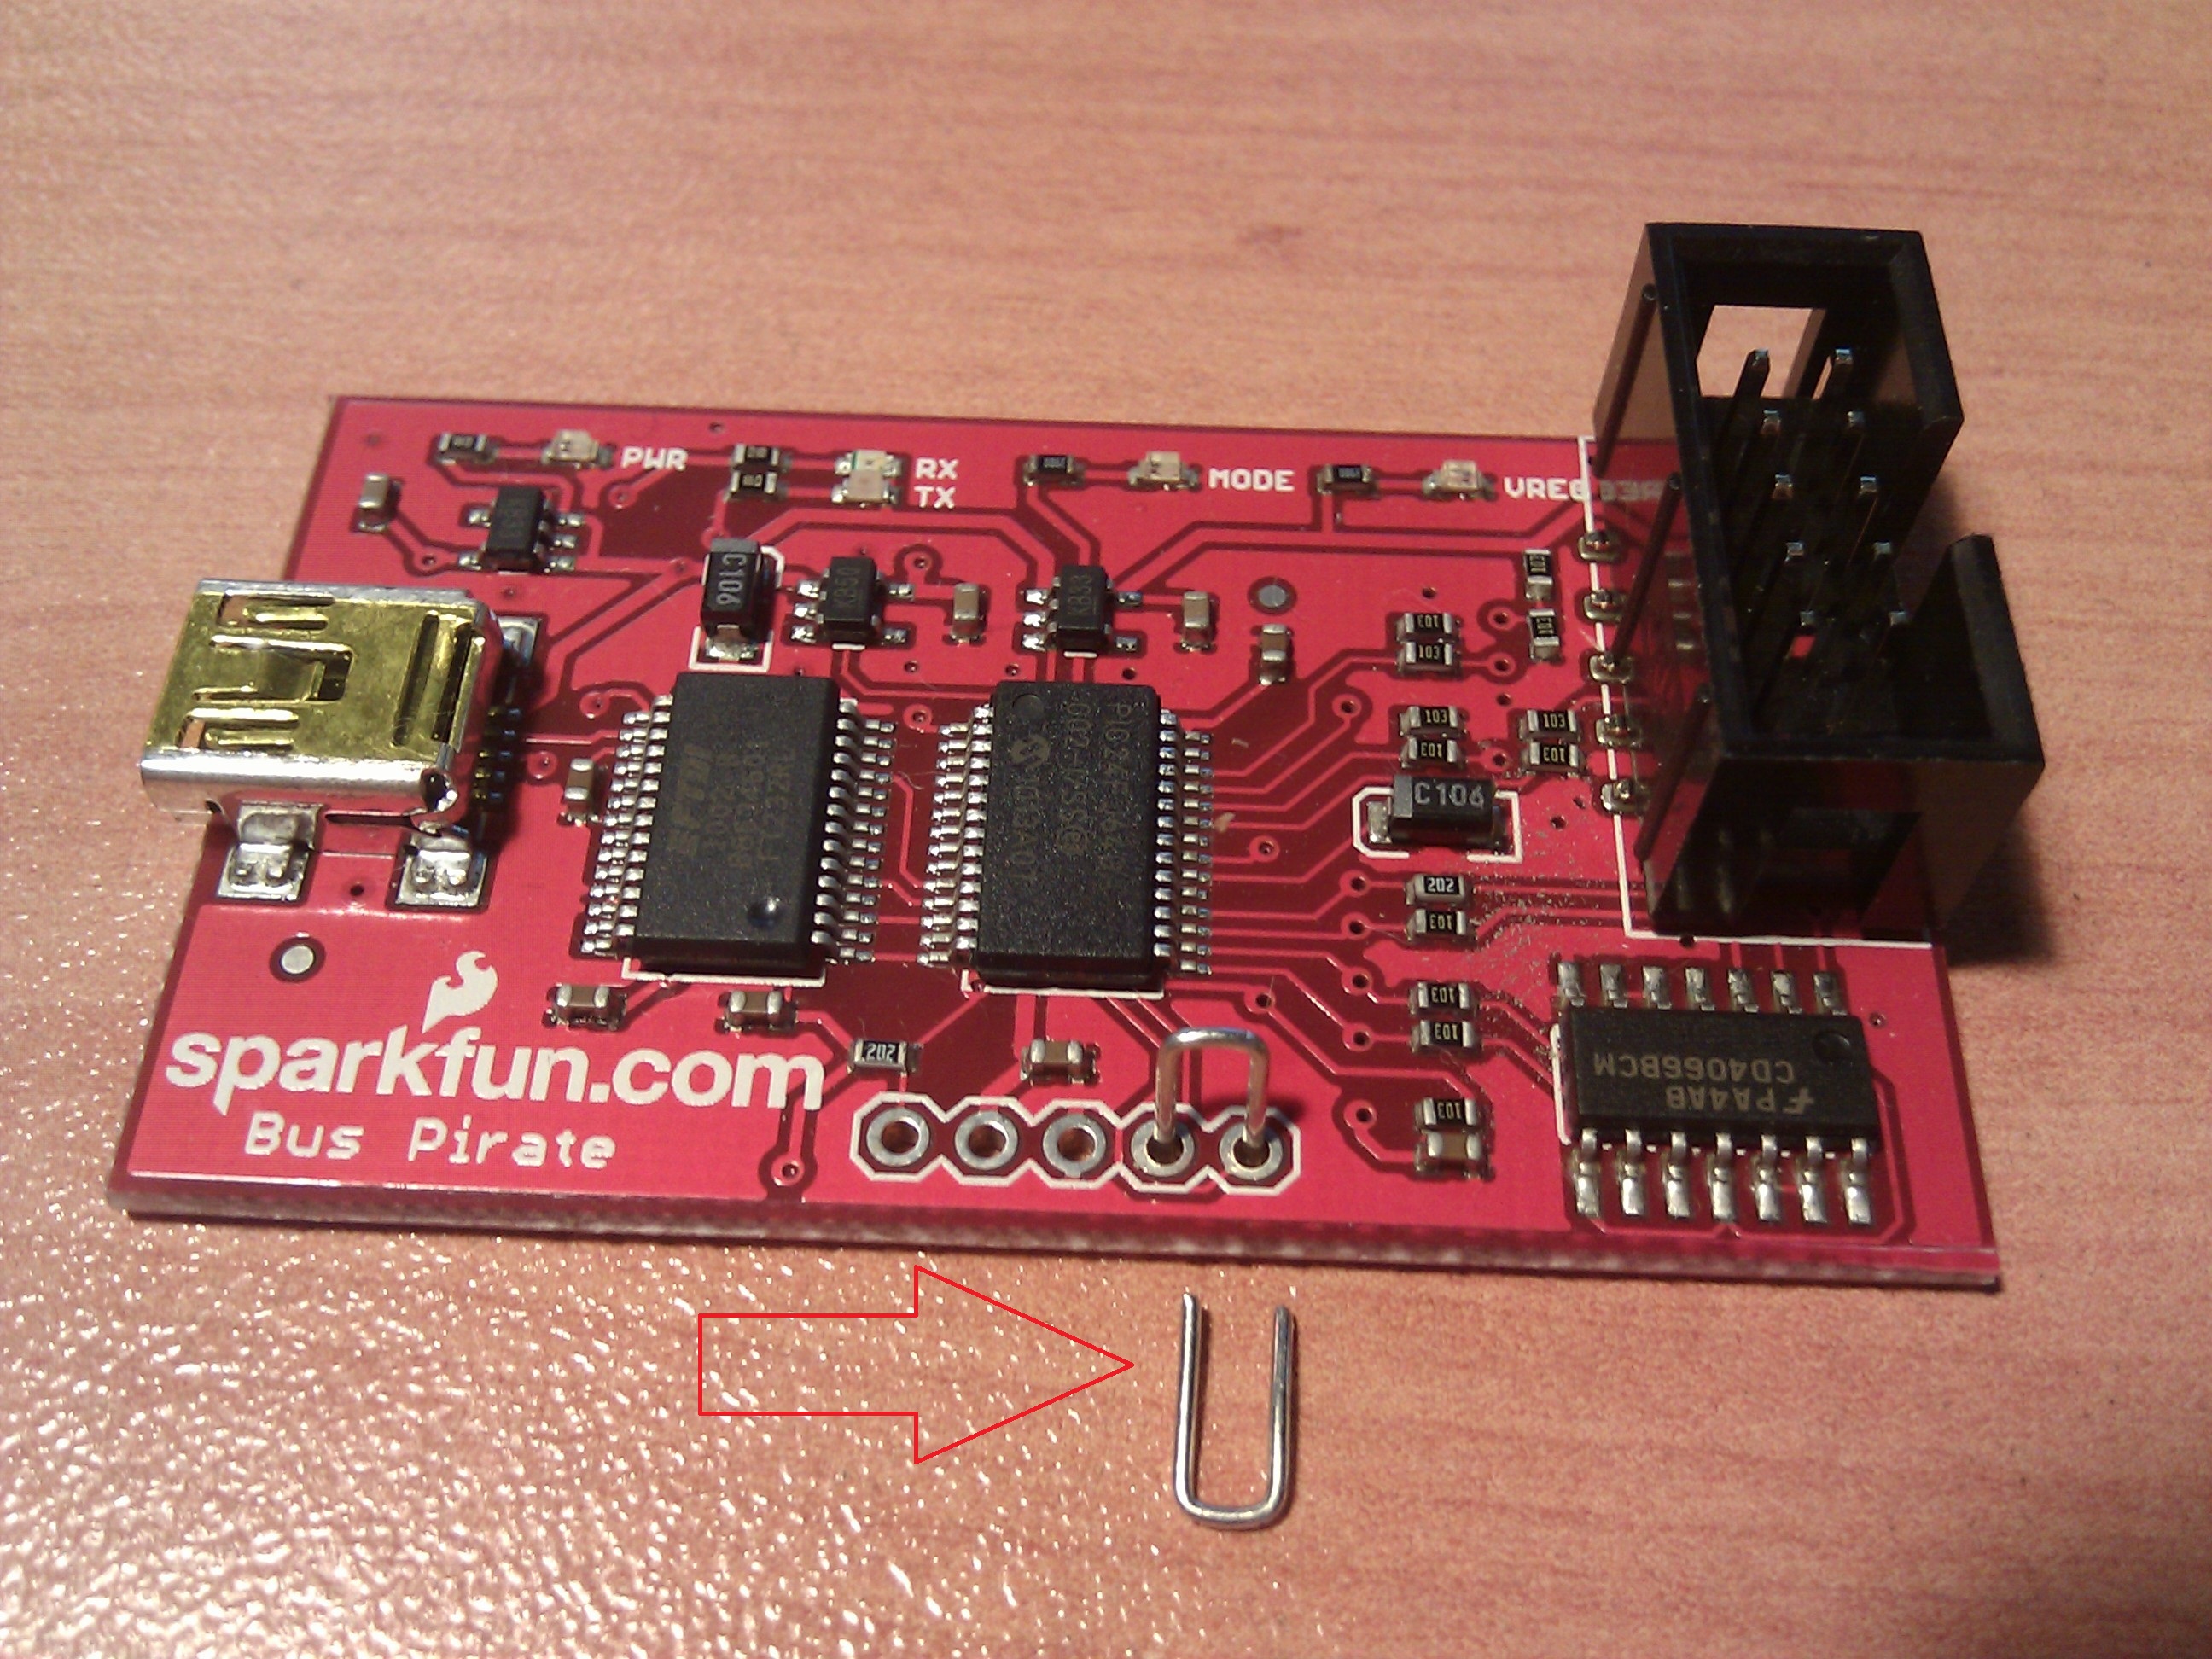
En la Fig. 1 vemos el Bus Pirate y dos jumper, uno a modo de ejemplo y otro conectado a los pins PGC y PGD para entrar en el modo actualización. Una vez que hayamos metido el jumper en los pins correspondientes debemos enchufar el Bus Pirate mediante USB.
Es el momento de actualizar nuestro gadget :)
We see in the Fig. 1 the Bus Pirate and two jumpers, one as a sample and the other connected to the pins PGC and PGD to enter the update mode. Once you have gotten the jumper in the corresponding pins, plug the Bus Pirate to the USB.
Time to update our gadget :)
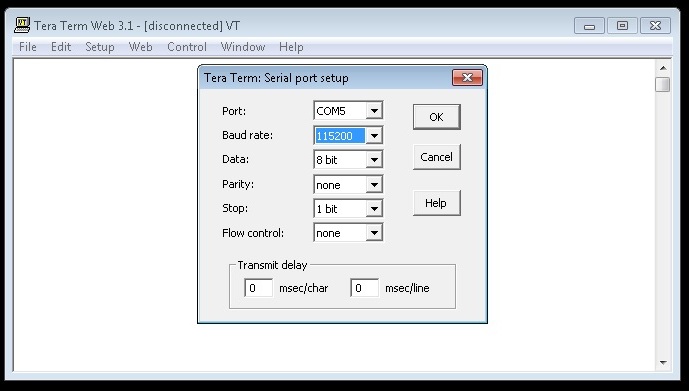
Como en la Fig.2 ejecutamos el Tera Term Web (el programa recomendado para comunicarse con el Bus Pirate y es gratis :) ) y debemos seleccionar el puerto COM (COM5 en mi caso) y la velocidad de transferencia a 115200.
As Fig.2 we run Tera Term Web (the recommended serial terminal to communicate with the Bus Pirate and is free :) ) and we must select the COM port (COM5 in my case) and the set the transfer rate to 115200.
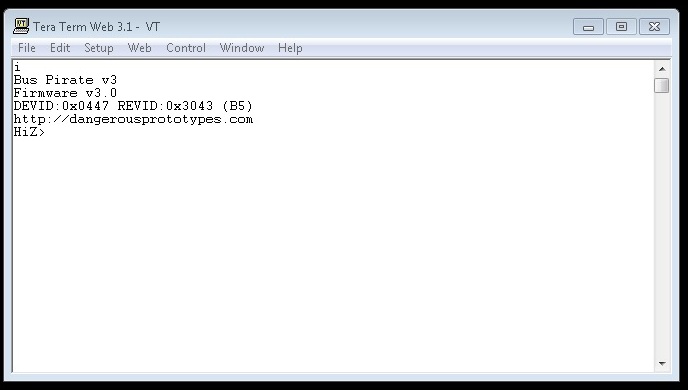
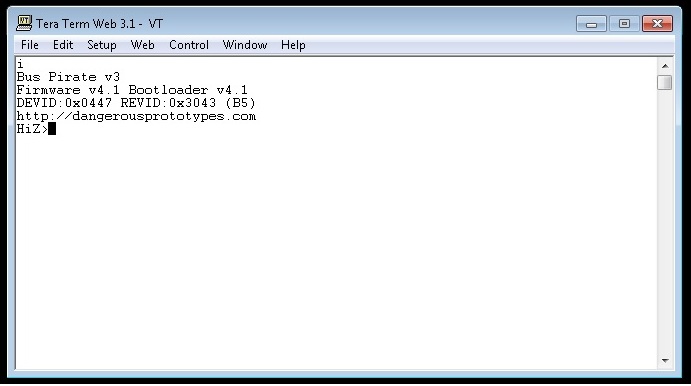
Si todo está correcto podemos comunicarnos con el Bus Pirate (Fig. 3). En la terminal he escrito el comando “i” para ver el status y podemos ver que la versión del firmware es la 3.
If everything is correct we can communicate with the Bus Pirate (Fig. 3). In the terminal I have typed the command “i” to see the status and we can see that the firmware version is 3.
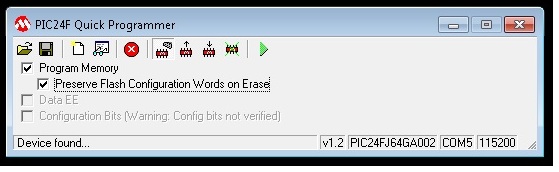
Según las instrucciones de Dangerous Prototypes (que debemos leer antes de seguir este post) ahora debemos ejecutar el bootloader (P24QP.exe) como vemos en la Fig. 4 y debemos seleccionar puertos y velocidad para comunicarse con el Bus Pirate. (Barra de estado)
As from Dangerous Prototypes documentation (which we should read before continuing with this post) we now run the bootloader (P24QP.exe) as we see in Fig. 4 and we must select ports and speed to communicate with the Bus Pirate. (Status bar)
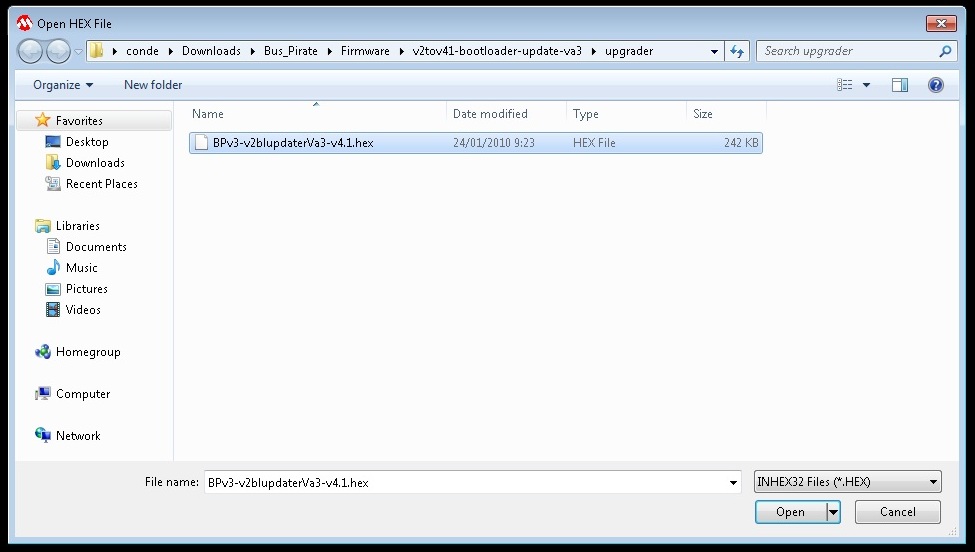
En la Fig. 5 seleccionamos el fichero BPv3-v2blupdaterva3-v4.1.hex
As Fig. 5 we now select file fichero BPv3-v2blupdaterva3-v4.1.hex
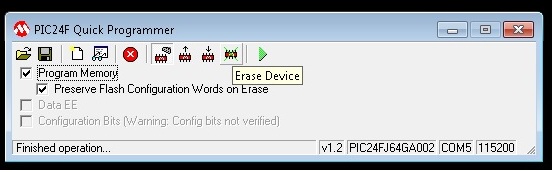
En la Fig. 6 le damos al botón de Erase Device para borrar el viejo firmware. Si no hacemos esto el nuevo firmware no funcionara correctamente.
As Fig. 6 we click on the Erase Device button to delete the old firmware. If we don’t do this the new firmware would not work correctly.
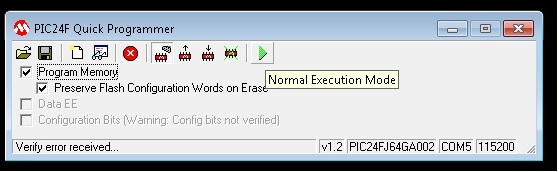
En la Fig. 7 ya comenzamos a escribir el nuevo firmware en el Bus Pirate. Primero le daremos a “Write Device” y cuando termine pulsamos en “Normal Execution Mode”.
As show in Fig. 7 we already begin to write the new firmware in the Bus Pirate. First we will click on “Write Device” button and when is finished click on “Normal Execution Mode” to write the firmware.
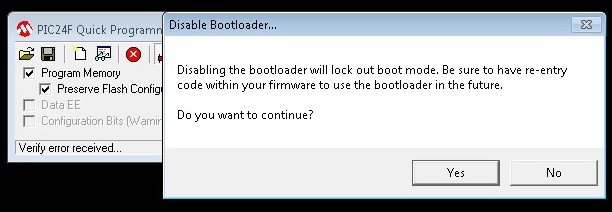
Al terminar el proceso de escritura nos saldrá una ventana de advertencia (Fig. 8 ), le decimos que “yes”. Podemos desconectar el Bus Pirate ya que debemos quitar el jumper para el siguiente paso, aunque después volveremos a meter en jumper.
At the end of the process of writing a warning window will pop up (Fig. 8 ) so just click “yes”. We now disconnect the Bus Pirate as we have to remove the jumper for the next step, though later we will insert the jumper again.
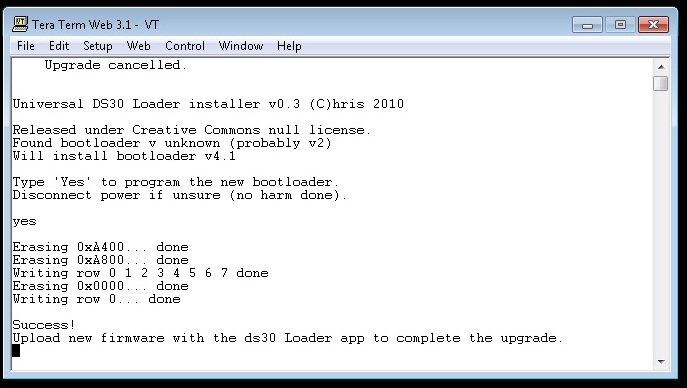
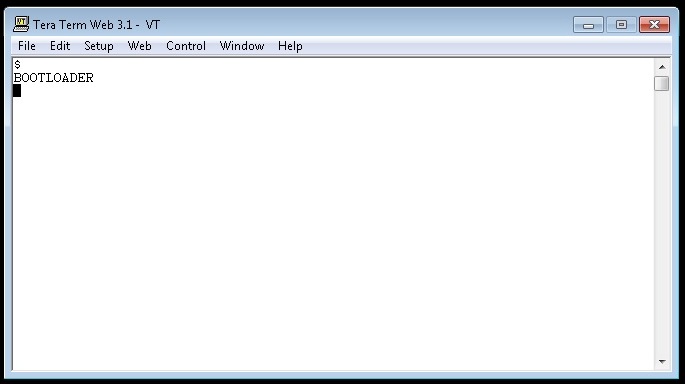
Ahora quitamos el jumper de los pins (PGD Y PGC) y conectamos el Bus Pìrate, abrimos la terminal y nos debería salir la Fig. 9. Escribimos “yes” y el firmware se actualizará.
Now remove the jumper from the pins (PGD and GCP) and connect the Bus Pìrate back, open a terminal and write “yes” for the firmware update process to begin. (Fig. 9)
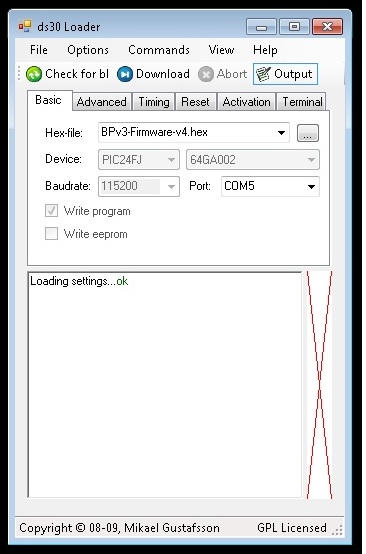
Para el siguiente paso ejecutamos el Ds30 Loader (antes tenemos que desconectar el Bus Pirate, volver a poner el jumper en los pins PGC y PGD y volver a conectar), debemos configurar la comunicación con el Bus Pirate (puerto COM) y le damos a “Hex-file” para seleccionar el fichero hex.
For the next step we need to execute the Ds30 Loader (before we must disconnect the Bus Pirate, put the jumper on pins PGC and PGD and connect again), we must configure the communication with the Bus Pirate (COM port) and we must click on “Hex-file” to select the hex file.
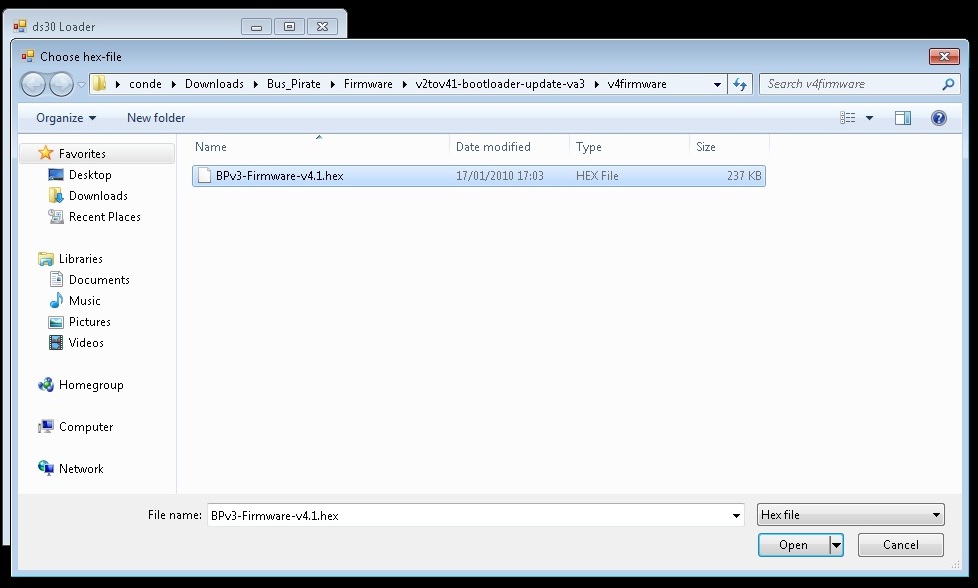
Seleccionamos el fichero BPv3-Firmware-v4.1.hex como vemos en la Fig. 11.
Select the file BPv3-firmware-v4.1.hex as you can see on Fig. 11.
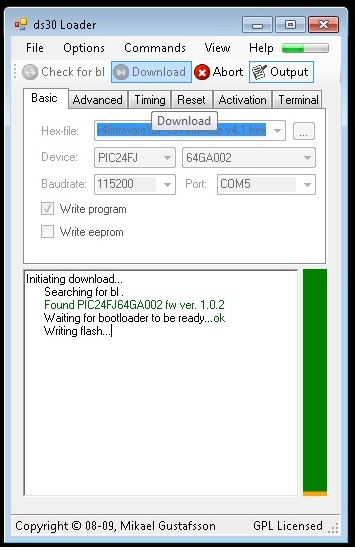
Ahora ya podemos actualizar el firmware a la versión 4, para ello seleccionamos “Download” como vemos en la Fig. 12.
Now we are ready to update the firmware to version 4, so just click “Download” as you can see on Fig. 12.
Si todo está bien ya tenemos actualizado el Bus Pirate al firmware 4.1 y que a partir de ahora será más fácil de actualizar (no hará falta el jumper) ya que se podrá hacer desde la terminal. Como existe una versión más nueva del firmware (v5) vamos a seguir actualizando pero es necesario pasar por la v4 antes de la v5 si tenemos las v2 o v3 del firmware.
If everything is OK we have updated the Bus Pirate to firmware 4.1 and from now on it will be easier to upgrade (no need for the jumper anymore) as the upgrade can be done from the terminal directly. As there is a newer firmware version (v5) we will continue to update but it is necessary to pass through the v4 upgrade before the v5 if we have the v2 or v3 firmware.
Como mencione anteriormente las actualizaciones son más sencillas, basta que ejecutemos en la terminal el comando “$” para activar el modo de actualización. Ver Fig. 14.
As previously mentioned the updates are simpler, just run the “$” command in the terminal to activate the update mode. See Fig. 14.
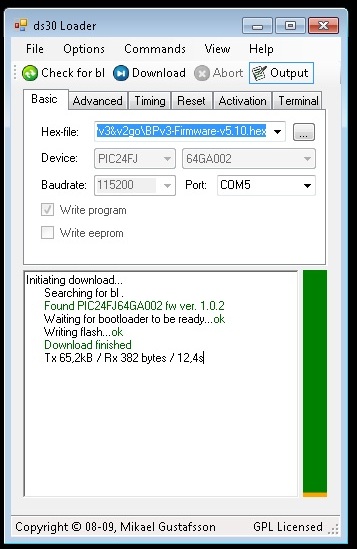
Volvemos a ejecutar el Ds30 Loader (sin necesidad de los jumpers) y seleccionamos la última versión del firmware. En mi caso he actualizado a la versión 5.10 disponible desde el 19 de noviembre.
Again run the Ds30 Loader (without the jumpers) and select the latest version of firmware. In my case I have updated to version 5.10 available since November 19.
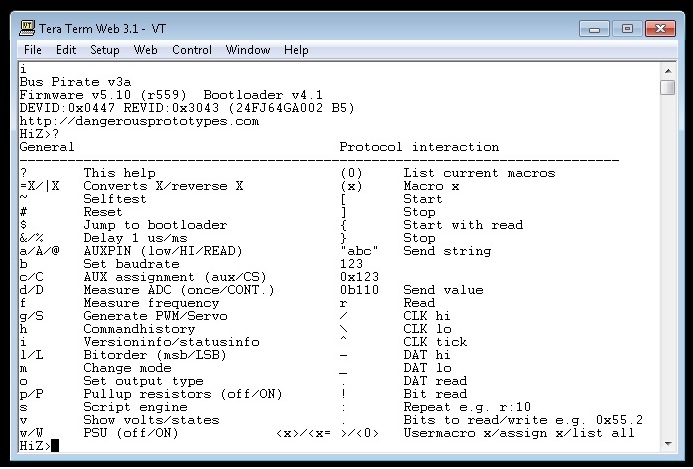
Ahora ya tenemos el último firmware disponible para el Bus Pirate. Momento de hackear :)
Realmente actualizar el Bus Pirate no es complicado pero requiere seguir los pasos y tener un jumper a mano o por lo menos otro material conductor. Y ahora para actualizar ya sabemos que sólo debemos seguir los pasos a partir de la Fig. 14 siempre y cuando tengamos como mínimo la versión 4 del firmware.
¿Tienes algún proyecto chulo con Bus Pirate?
Now we have the latest firmware available for the Bus Pirate. Time to hack :)
Actually updating the Bus Pirate is not complicated, but requires some steps and having a jumper at hand or at least another conductive material. And from now on to update we just follow the steps from Fig. 14 provided we have at least firmware version 4 or later installed.
Do you have some cool projects with Bus Pirate?
Enlaces / Links:
- Bus Pirate Doc http://dangerousprototypes.com/docs/Bus_Pirate
- Bus Pirate: Firmware Upgrades http://dangerousprototypes.com/2009/07/24/bus-pirate-firmware-upgrades/
- V2 to v4 upgrades http://dangerousprototypes.com/docs/V2_to_v4_upgrades
- Ds30 Loader GUI http://dangerousprototypes.com/docs/Ds30_Loader_GUI
- The Bus Pirate http://code.google.com/p/the-bus-pirate/
— Simon Roses Femerling


7 Responses to Bus Pirate Firmware Update Made Easy