
El escáner de vulnerabilidades Nessus es una potente herramienta para auditar sistemas aunque flojea en la generación de informes. En este post comentaré algunos trucos que utilizo para generar informes de forma rápida con la ayuda de Microsoft Excel 2007 o 2010 (Importante: esto sólo funciona con la versión Excel 2007 o superior).
Nessus vulnerability scanner is a powerful tool for auditing systems although is weak in reporting generation. In this post I will comment on some tricks I use to generate reports quickly with the help of Microsoft Excel 2007 or 2010 (Important: this only works with Excel 2007 or higher).
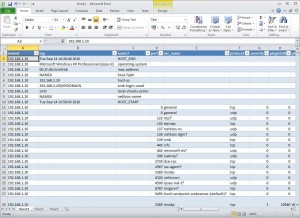
Una vez realizamos un escaneo mediante Nessus debemos guardar los resultados en formato XML para que podamos abrirlo con Excel. Estos son los pasos:
Once we make a scan using Nessus we must save the results in XML format so that we can open it with Excel. These are the steps:
1- Abrimos Excel -> Fichero -> Abrir y seleccionar el fichero XML.
1- Open Excel -> File-> Open and select the XML file. 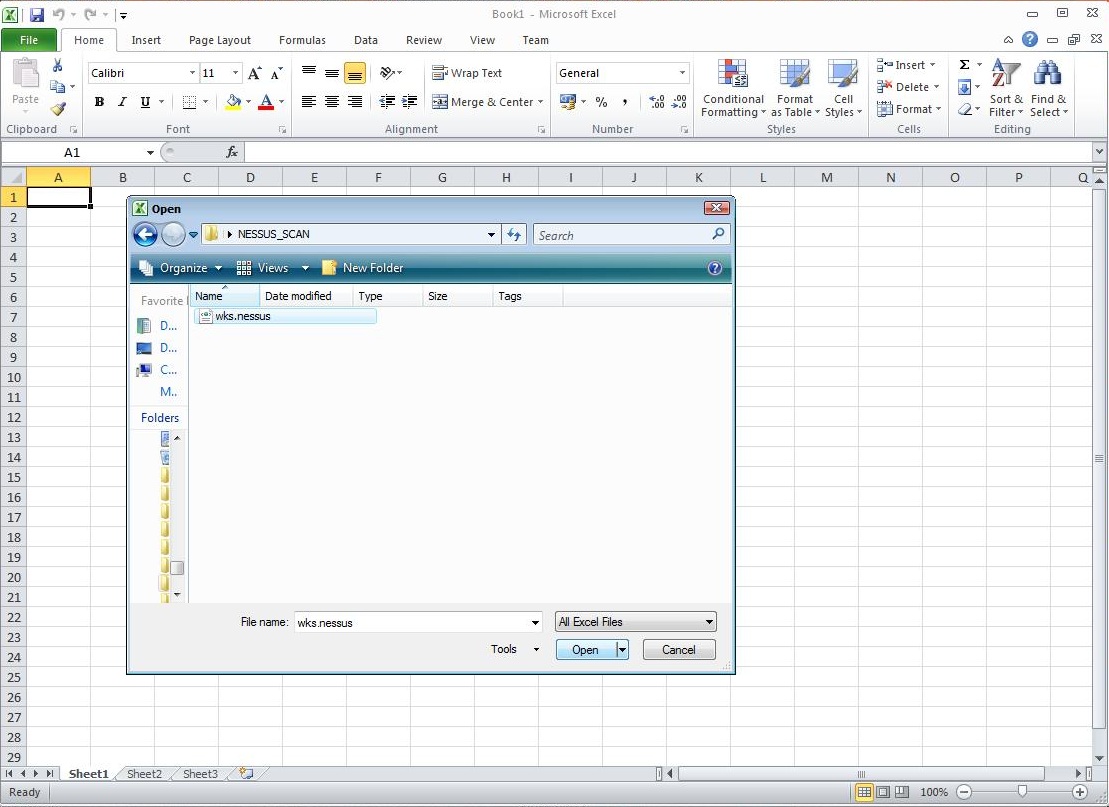
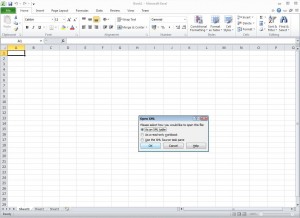
2- Al seleccionar el fichero, Excel nos mostrará una ventana para preguntarnos en qué formato debe abrir el fichero, en nuestro caso seleccionamos la primera opción “como una tabla XML”.
2 – Select the file, Excel will show us a window to ask in which format should open the file and in our case we select the first option “As an XML table”.
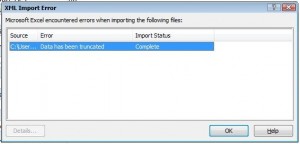
3-Nos dará un error pero no pasa nada, le damos OK :)
3 – Excel will give us an error but no worries, just click OK :)
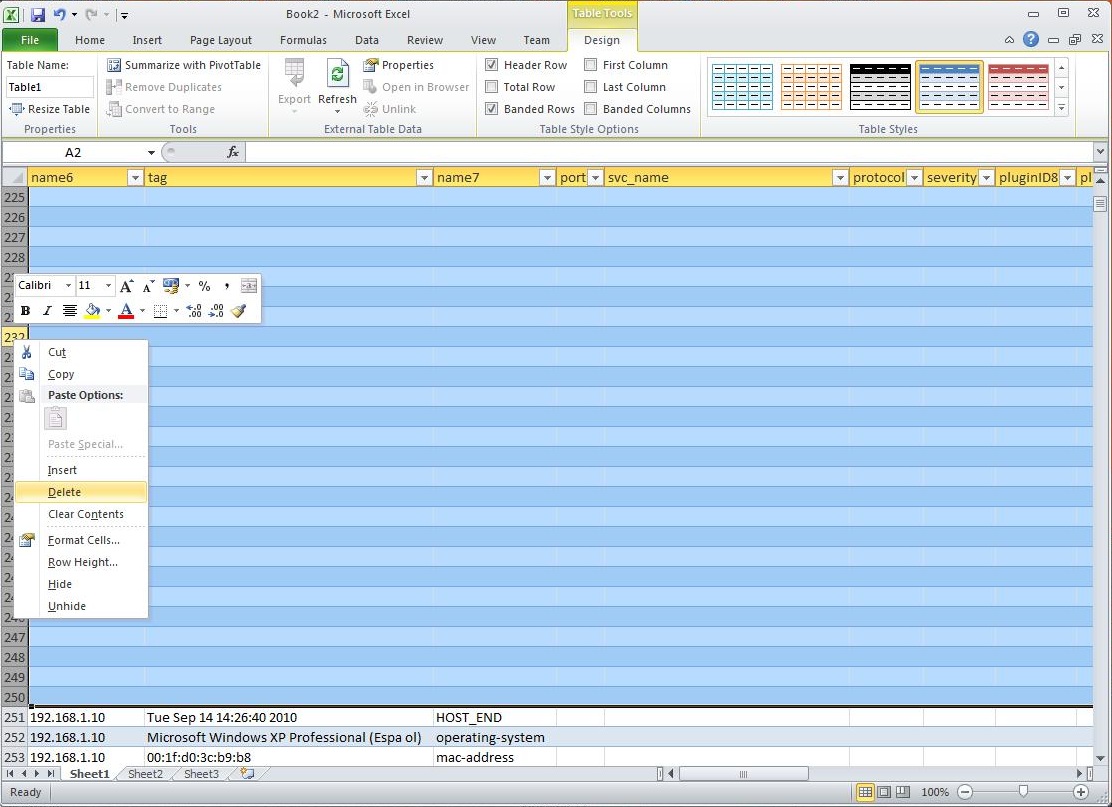
4- Ahora toca hacer limpieza de la tabla generada y esto va en función del gusto de cada uno. Yo suelo quitar las columnas (borrar) desde PolicyName hasta name5 (18 columnas, A-R) ya que no tiene nada de interés.
4- Now it is turn to make some cleaning in the generated table. I usually remove columns (delete) from PolicyName to name5 (18 columns, A-R) because it has nothing of interest to me at least.
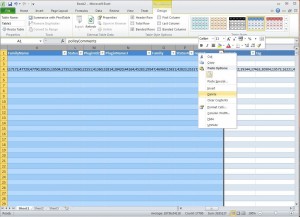
5- A continuación le toca el turno a las filas, por lo que borro desde la fila 2 hasta la fila 250. Lo que sucede es que todas estas filas se quedan vacías al realizar el paso 4. A partir de la fila 251 viene el resultado de los sistemas escaneados.
5 – Then it is the turn to clean rows for which I delete rows from row 2 to row 250. What happens is that all these rows are empty when you perform step 4. At row 251 starts the result of the scan.

6- Al realizar los pasos 4 y 5 la información del escaneo queda a partir de la columna A, línea 2 y podemos empezar a trabajar en el informe :)
6 – Due to perform steps 4 and 5 now the scan information starts at from column A, row 2 and we can start working on the report :)
Este procedimiento tan simple nos salvara un montón de horas y agilizará la creación de los informes. Excel es una fantástica herramienta para analizar y filtrar información que podemos utilizar para nuestras auditorías.
This simple procedure saves us a lot of hours and speeds up the creation of reports. Excel is a fantastic tool to analyze and filter information that we can use for our audits.
Como he mencionado antes pueden existir otras columnas y filas que seguramente debamos borrar ya que no tienen datos de interés pero eso lo veremos con la práctica. Yo personalmente realizo más pasos que no detallo ;)
Tienes algún truco o herramienta para los informes de nessus?
As I mentioned earlier there may be other columns and rows that we should probably delete because it has no data of interest but we will decide that with practice. I personally do more steps that I’m not detailing ;)
Do you have other tricks or tools for nessus reports?
— Simon Roses Femerling


